How to Create and Link a GPO in Active Directory
May 29, 2024
How to Create and Link a GPO in Active Directory
Introduction
This article will walk you through on how to create and link a Group Policy in Active Directory. If this is not the solution you are looking for, please search for the solution in the search bar above.
Guidelines
Creating a GPO is a fairly simple task, so long as you know what settings you need to change, and how to apply it to the endpoints you are trying to affect. These instructions will need to be done by a user who is a member of the Group Policy Creator Owners group, on a domain controller with Group Policy Management.
-
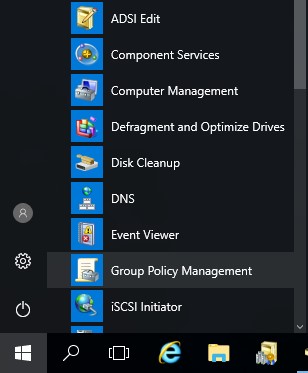
Open Group Policy Management by navigating to the Start menu > Windows Administrative Tools, then select Group Policy Management.
-
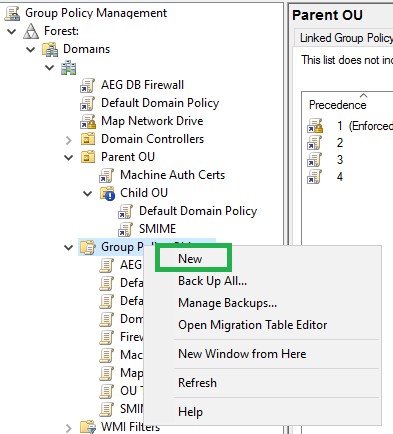
Right-click Group Policy Objects, then select New to create a new GPO.
-
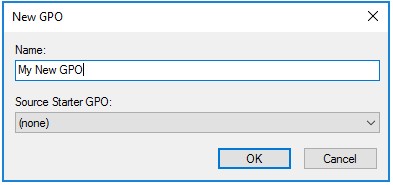
Enter a name for the new GPO that you can identify what it is for easily, then click OK.
-
Select the GPO from Group Policy Objects list, then in the Security Filtering section, Add and Remove users, groups, and computers that the GPO should apply to.

-
Right-Click the GPO, and select Edit. Change any of the policies you want to apply in the Computer and\or User Configuration. Close the GPO Editor when you are done.
Note: Check the Public Key Policies section for how to configure policies for Certificate Automation Manager.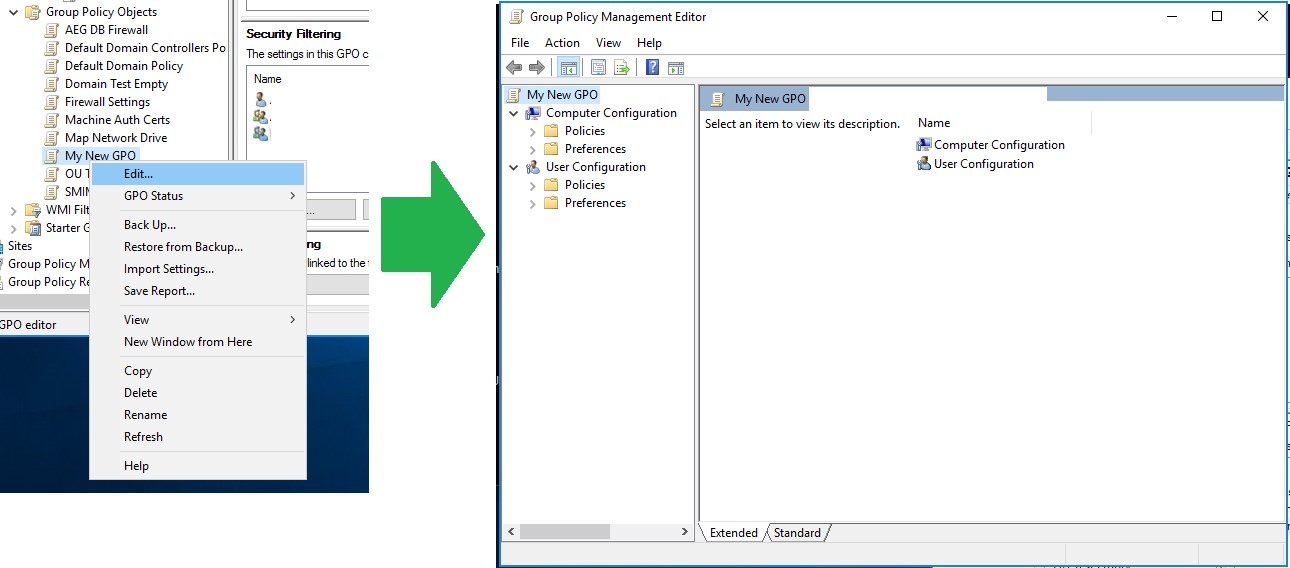
-
Now, the GPO is created, but you still need to link it. Locate the OU or Domain you want to apply the GPO to, then right-click it, and select Link an Existing GPO..., then select your GPO from the list, and click OK.
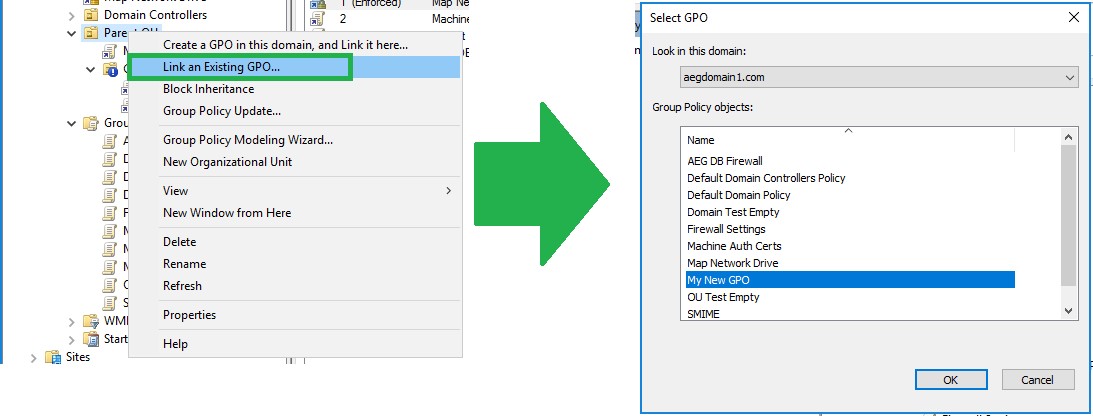
Note: Inheritance defines what GPO will override the settings of another. From lowest to highest priority, the levels that GPOs can be applied to are:
- Local - These are policies applied locally to the system and user.
- Site - Policies applied to anything that is a member of a site, will override settings that are configured on the Local level.
- Domain - Settings in GPOs linked to the domain, will override settings configured in a GPO that is linked at the Local and Site level.
- Organizational Unit - GPOs linked here will override any other GPOs, except those linked to a Sub-OU, or a GPO that is marked as Enforced.
- Enforced - An Enforced GPO will override the settings of all other GPOs, unless blocked by Block Inheritance.
Related Articles
SSL Configuration Test
Check your certificate installation for SSL issues and vulnerabilities.
